
What You Need to Know For Centrifugal Pump Maintenance
As part of Service Pump’s free training opportunities, we recently offered a virtual Centrifugal Pump Installation, Maintenance, and Troubleshooting course. We’ve broken down key topics from that course in this blog series, which shares expert strategies to ensure proper installation and tips to maximize the life of your pump.
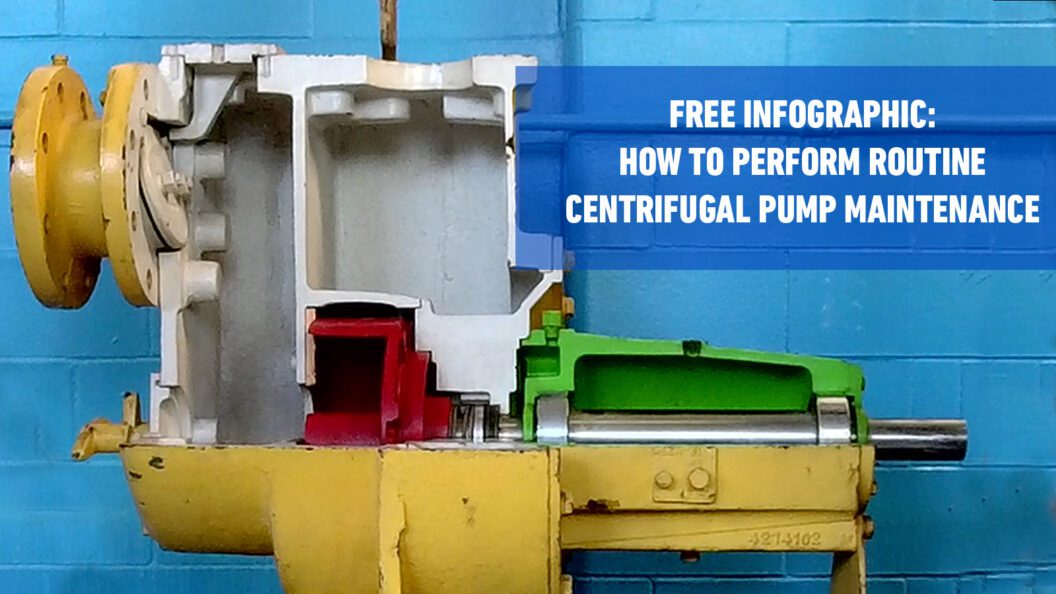
Even with a perfect installation, regular pump use will result in wear and tear on your equipment. Performing routine maintenance can help extend the life of your centrifugal pump. In the video below, SPS Vice President Danny Spears and Sales Manager Charlie McKenzie share step-by-step instructions for performing routine centrifugal pump maintenance.
Looking for a solution to your water problems? Give us a call at 1 (800) 480-7867!
How to Perform Routine Centrifugal Pump Maintenance
To start, check the packing and adjust or replace it if necessary. Inspect the mechanical seal and ensure proper adjustment, and then recheck the pump’s alignment. Document flow, pressure, and amperage, and compare these readings to the baseline measurements. This ensures your pump is working at optimal levels. If the pump performs below the baseline numbers, you may need to go back and make additional adjustments.
Next, ensure the bearings in the pump and motor are properly lubricated using either grease or oil. For best results, refer to the owner’s manual before lubricating the pump. It’s essential to stay consistent with the type of lubricant, and not mix and match grease and oils.
During your annual maintenance checks, ensure no rust or deterioration is present on your pump. Check the wear on the flexible couplings, and ensure the shaft and coupling guards are in place and securely fastened. Check and retighten all fasteners that bolt down the pump and motor.
Finally, have a qualified electrician check for loose electrical connections. Retighten any loose connections as necessary.
Download our free infographic and keep all your centrifugal pump maintenance information in one spot!
Transcript
Danny Spears: This is the second segment is performing routine maintenance. This is after it’s been in service, and you can periodically check things, mechanical, driven equipment, you know, it uses oil, gets wear, tear, So, you wanna make sure you do certain checks, as previously shown, in previous class, about packing replacement, it all applies, whether it’s a vertical turbine pump, or centrifugal pump.
This particular one has mechanical seals so, there’s really not too much adjustment on the mechanical seal, once you get everything else adjusted, the setting, the, but, you know, like I just showed previously, this particular pump, has a, open top impeller, which there’s no shroud on, on no wear ring, and you’ve got different kinds of centrifugals, has different kinds of adjustment. This particular one has lock down bolts, and dracking screws on the bearing housing, which enables you to move it in and out, to close up the clearance, from the impeller to the inside of the blue casing. As previously said, this particular pump has a mechanical seal. You want to check, and make sure it’s got the proper adjustment, or usually there’s instructions with each seal. You have to actually install it, or do an adjustment on it, and it tells you how to get the setting, once you have done your other adjustments, and inspect that, make sure that’s correct. Sometimes they’re shipped with a spacer, or a shipping fork, and those have to be removed, and maybe final, lockdown, after everything’s in place.
But as previously documented, and when you did the initial installation, check, the amperages, the voltage, the pressure output, and the flow, and see if you’ve got everything you need as compared, or trending, how it compared to what it was, when you first installed it. You care to talk about this, Charlie on the,
Charlie: Yeah.
Danny: Lubrication, and so forth?
Charlie McKenzie: On lubricating the bearings you got oil, or you got grease. One thing is you don’t want to mix the oils, or mix grease, make sure you’re using the same type. As far as greasing the bearing, it’s based on the hours that you run it, and the operating condition and speed of it. So you need to go to the owner’s manual, and always refer to it for your specific needs. You always want to look at it, every time you inspect it, it’s a yearly inspection, to make sure you don’t see any deterioration on the base, it’s going to cause any issues, or a lot of rust build up on it. If it is, you need to treat that, because if you don’t deal with it, it will just get worse, and cause you problems.
You make sure before you take the guard off, or do any mechanical stuff, it’s locked out tagged out. Once you’ve done that, you know, you wanna pull the guard off it. I can check for our alignment, and everything, I see if we’re still lined up. We can make sure nothing’s come loose. Bolts, screws, nuts, they all can work themselves loose. So we wanna check all that stuff, make sure everything there is tight, and everything’s working the way it’s supposed to. Put our guard back on, and bolt it down.
After we everything hooked up, we got our water valve, our valves turned back on, our water’s on. We’ll have a qualified electrician, energize it and run it. If we haven’t unhooked anything, other than locking it out, our rotation should still be the same. When we start it up, we want to, again, check the amps, the bolts, pressure on the gage, if you’ve got a gauge, if you got a flow meter, do it record every bit of it, and you can take it back, compare it to your initial start up.
Then you can see if you’re losing any performance, and if you are, you might need to go back up here, and re-adjust the pump, on an open impeller, if it’s a closed impeller, you might have to pull it and actually get sent off to the repair shop, get rebuilt.
Danny: We’ll step over here. We’ve got a couple more examples we want to show you, about the different styles of impellers and adjustments. Like I said before, we got different types of impellers. You’ll see different impellers on this, whatever the application may be. This particular one is a trash pump. it’s an open vein trash pump that uses a wear plate on the front, and this particular one is a self primer, that, from the looks of it, it’s got a check valve on the suction side, That helps keep it can be full of water when you’re first, initially priming it, and it has, looks like a cup water area, where the impeller comes in close to it, help evacuate the air out of the system. Particular adjustment on this one, there’s a wear plate here, that can be shimmed, and then locked down in place. Some of these, they might have shims in behind the impeller, because over time, this front area will wear, on this wear plate, and you want to close that gap back up.
This particular unit looks like it’s an oil filled unit, which, like with the other pump, it’s best to have a site level oar, that we can actually, visually see it. There’s a breather up here for expansion of heat. We’ll step over, and see this other one here. See the third example. This is another example, a style of pump. This is a closed, enclosed impeller. trash-type pump It may only go up to maybe like inch solids, at the most. So it can hit a lot of different areas of application, which you may be using. This particular one has no adjustment on the bearing frame or impeller. What determines the clearance, is the wear rings of the impeller, to the ID of the wear ring side of the pump case.
A rough rule of thumb, it’s going to be somewhere around 15 thousands, plus or minus, depending on what’s, what size it is, what application it is, and what temperature the water is. If you take one off, take the blue housing off, these were balancing, where they’ve actually had to balance the impeller. So it’s not wear spots, it’s where they take weight off of it, dynamic rebalance the impeller, to get everything running smoothly. This particular pump, the lubrication is grease lubrication on the front bearing, and the back bearing. There’s these zerk fittings, and these little plastic protective caps, usually, but it’s a grease fitting that you can apply grease, by the recommended lubrication specs in the IOM manual. You gotta make sure you got a compatible grease, and use it. You know, you don’t want to use different base grease, and that’s not compatible with each other, but here’s one on the front, one on the back, and you’ve gotta not over grease the bearings, because it will cause premature failure. They have to have room to breathe. The whole rule of thumb is, no more than two thirds capacity of bearing of grease, but you definitely don’t want to fill this whole cavity up. That would be a detrimental pump failure, real quick. As within a motor, you never want to over grease them so, too much grease can be worse than not enough.